
 1 month ago
152
1 month ago
152
.jpeg)
.jpg)
When launching advertising campaigns on Facebook, many advertisers face ad rejections during the moderation process. These issues are especially common when working with gray-hat approaches and verticals.
One way to bypass moderation is by running ads through catalogs. This method has long been known within the affiliate marketing community and continues to be used by affiliates due to the way ads are processed within Meta’s ecosystem. However, this approach does not guarantee a 100% success rate, as moderation algorithms are constantly evolving and largely depend on the specific account being used.
What You Need Before Setting Up a Catalog
Before creating a catalog, make sure you have the following prepared in advance:
- creatives;
- ad copy;
- a working tracking link;
- a Business Manager account with the necessary access permissions.
Catalogs can be set up in two ways:
- through Business Manager;
- through a regular ad account.
In practice, the most convenient option is working through Business Manager, so this is the method we will focus on below. However, the overall setup logic remains the same for both approaches.
Setting Up a Catalog Through Business Manager
One of the advantages of using Business Manager is the ability to manage advertising campaigns from a single interface. You can also create datasets (pixels), add apps, or Fan Pages (offer pages), and connect them to multiple auto-registration ad accounts.
Catalogs can also be used across several advertising accounts at the same time, so it makes sense to create a separate pixel first, which is where we will begin.
Creating a Pixel
Before you start, you should already have a Business Manager account created. Such accounts are often referred to as KING accounts.
Next, go to the Business Manager settings:
https://business.facebook.com/settings/
In the main interface, navigate to Data Sources → Datasets & Pixel and click the Add button.
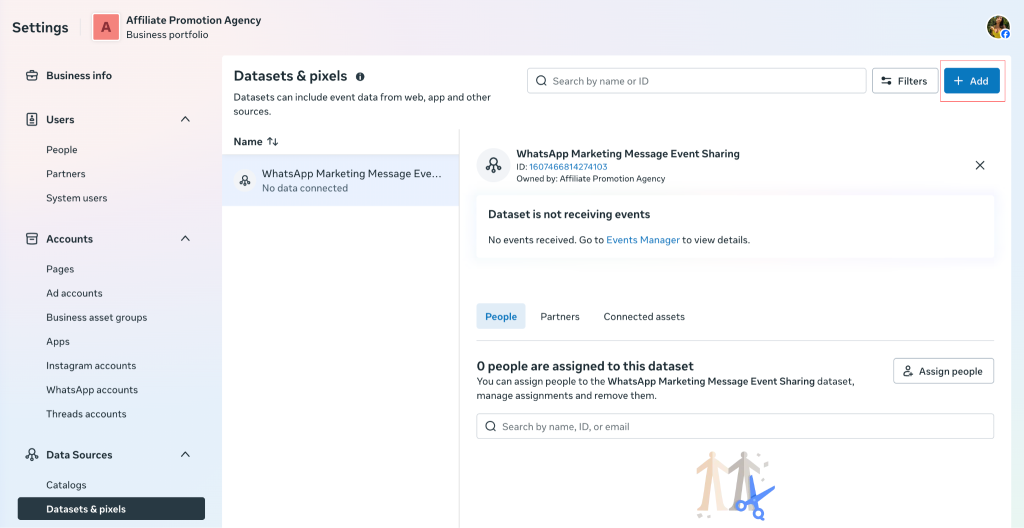
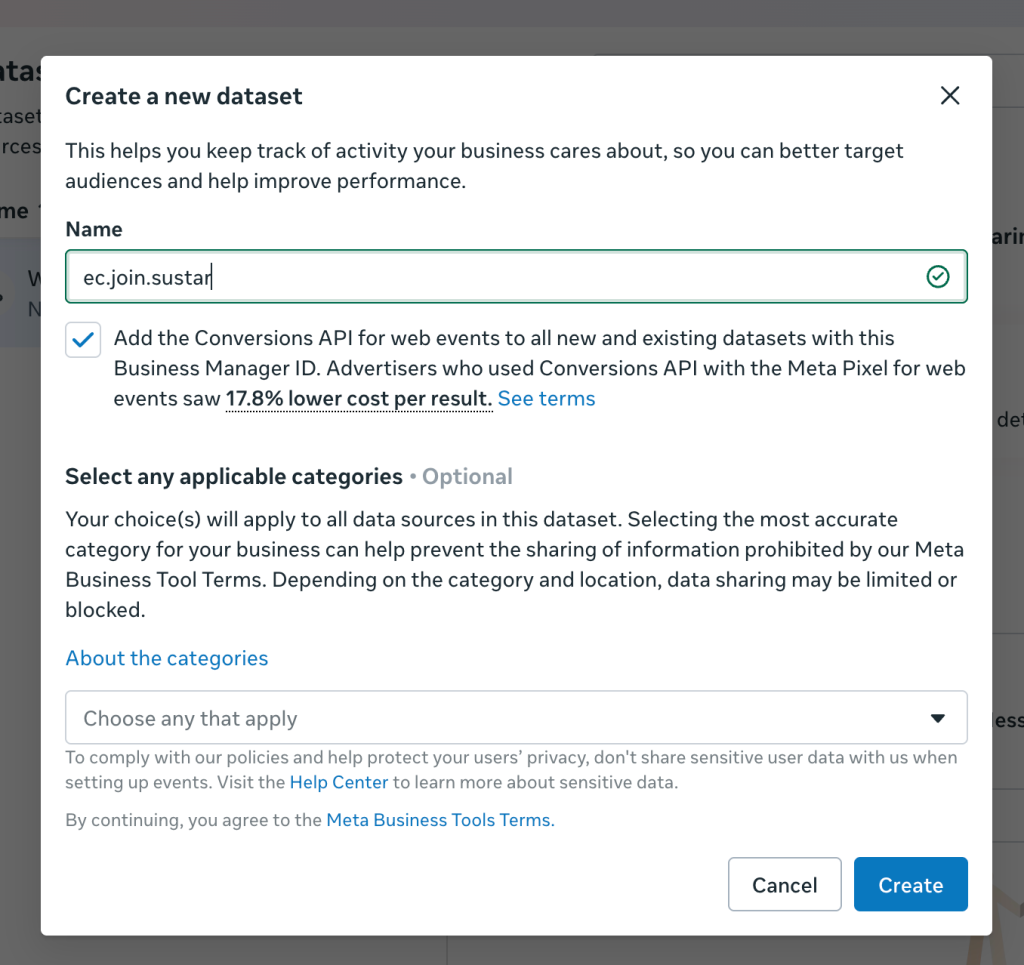
Next, assign a name to the pixel. Leave the category field blank when selecting a category. Use a name that will remind you of the niche and GEO you are running traffic for, for example, “ec.join.sustar”. This way, if you switch offers in the future, you will still be able to use the already-trained pixel.
 It is not recommended to use medical terms or the offer name in the pixel name, as this may cause your pixel to be flagged and restricted.
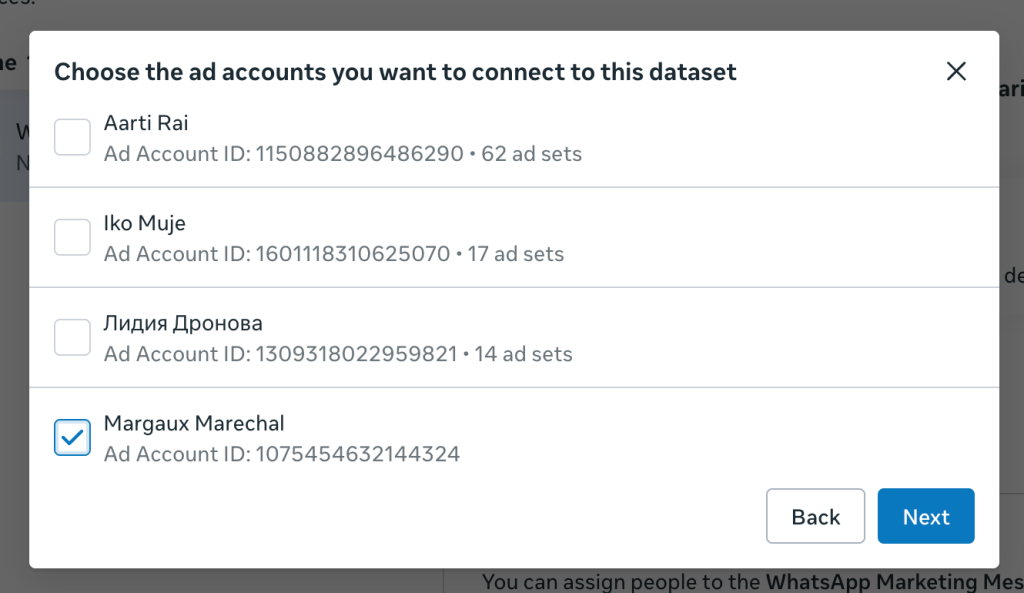
After creating the pixel, you need to select the ad accounts that will be linked to it.
Next, go to Assign People settings and assign the user who will be working with the pixel. This will always be the account you are currently using (You).
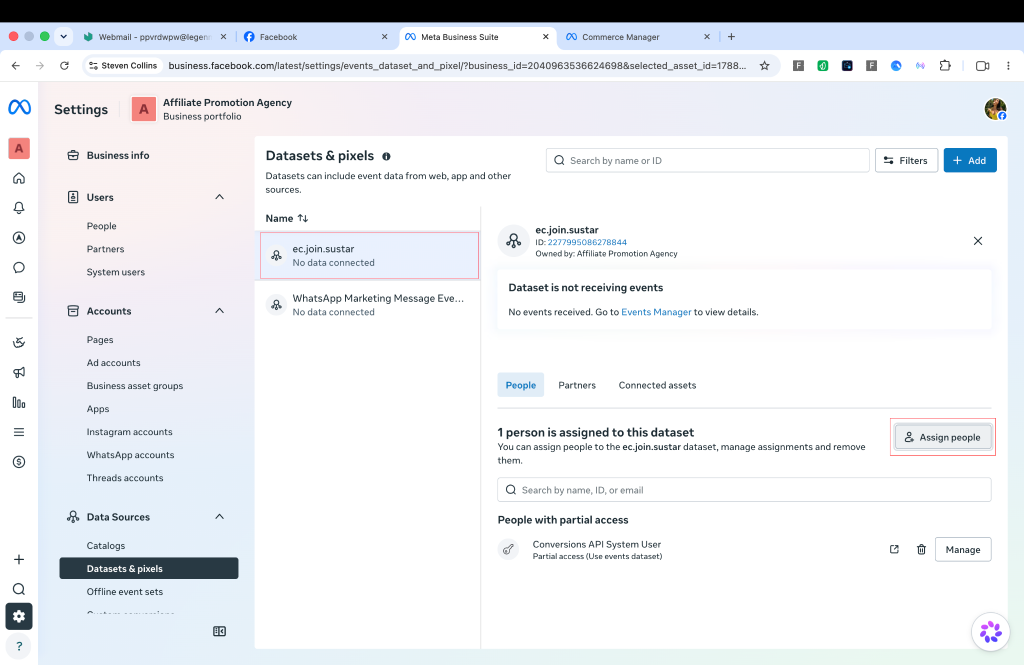
Grant the account Full Access permissions.
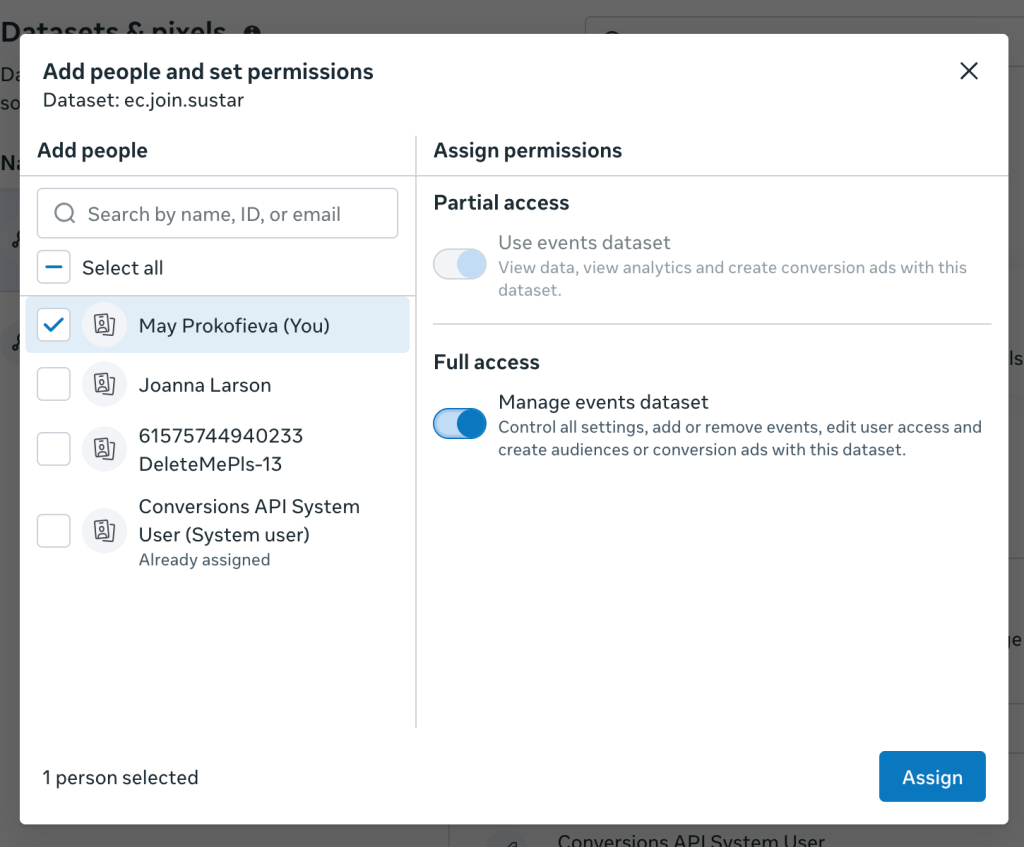
Once this is done, you can proceed to setting up the catalog.
Setting Up a Catalog
In the same Data Sources section, navigate to Catalogs. Just as in the pixel setup example, click the Add button.
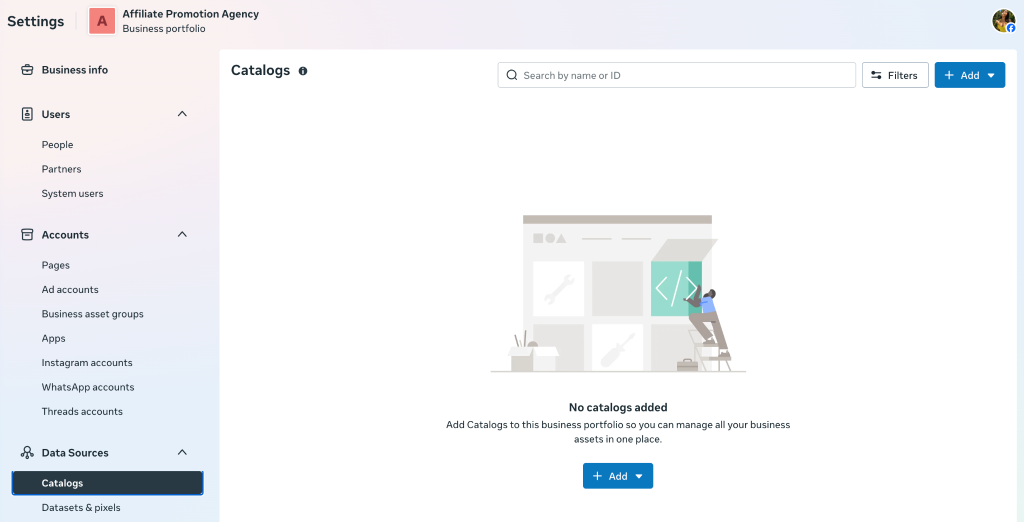
Select Create a New Catalog.
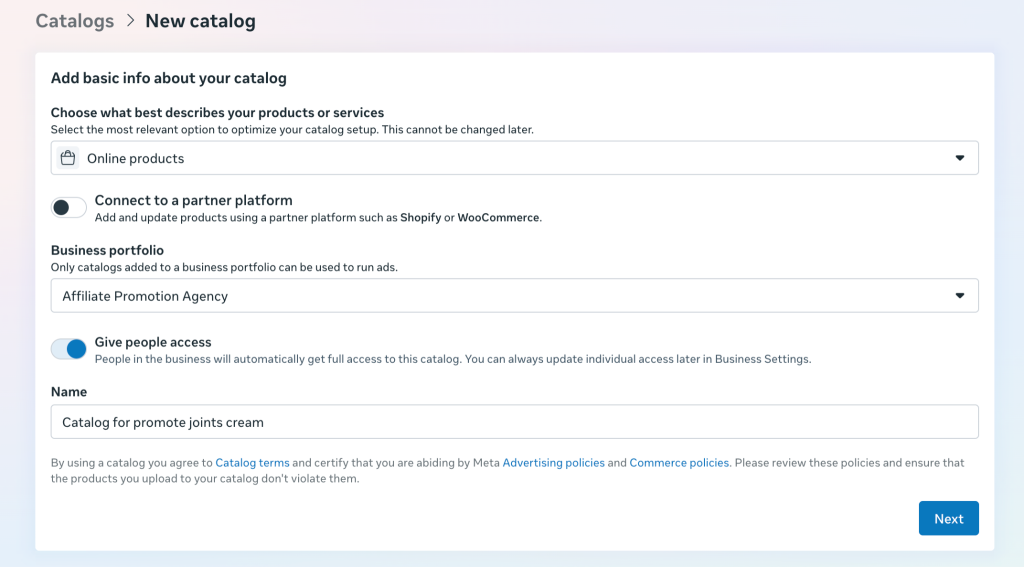
During the setup process, you will need to:
- choose Online Products as the catalog type;
- select the appropriate Business Manager;
- assign a name to the catalog.
Next, select the pixel that was created in the previous step.
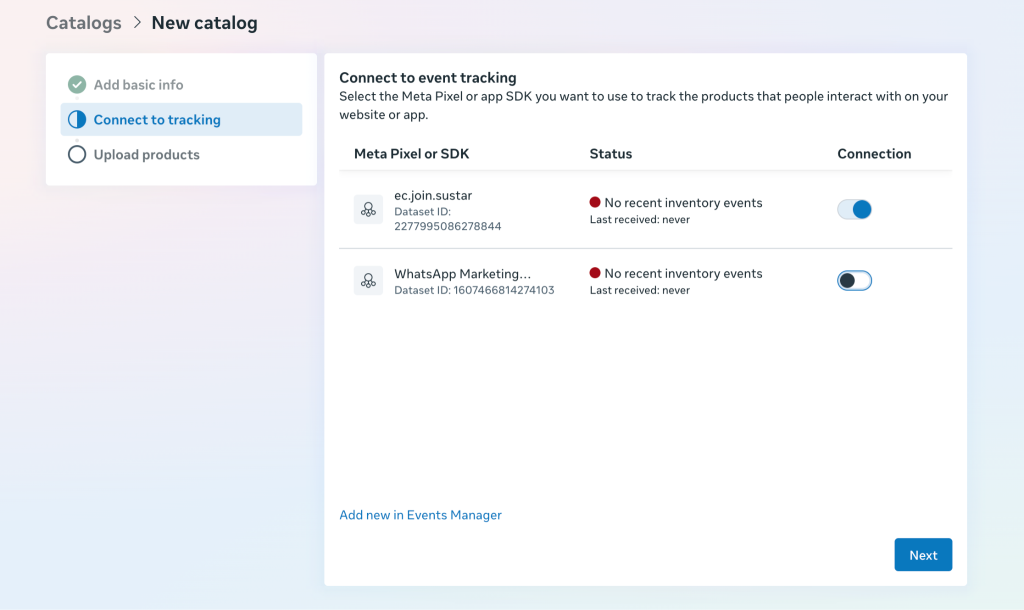
The next stage is choosing a data source for the catalog.
Meta offers several options:
- upload via Google Sheets;
- upload via an Excel file;
- connect social media accounts;
- create the catalog manually.
For this example, select Manually Add Your Products.
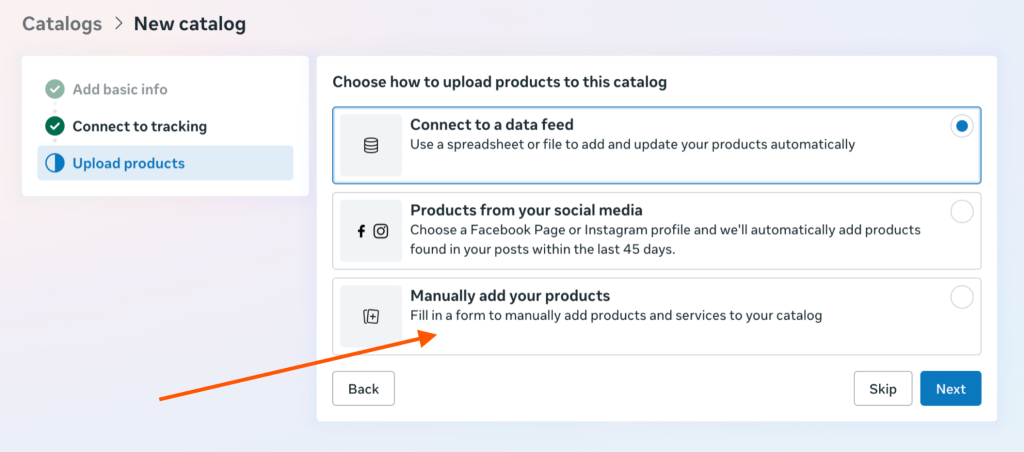
After confirmation, the catalog table will open.
Filling Out the Catalog
For the catalog to function correctly, you need to complete the following required fields:
- Images and Videos;
- Title;
- Description;
- Website Link;
- Price.
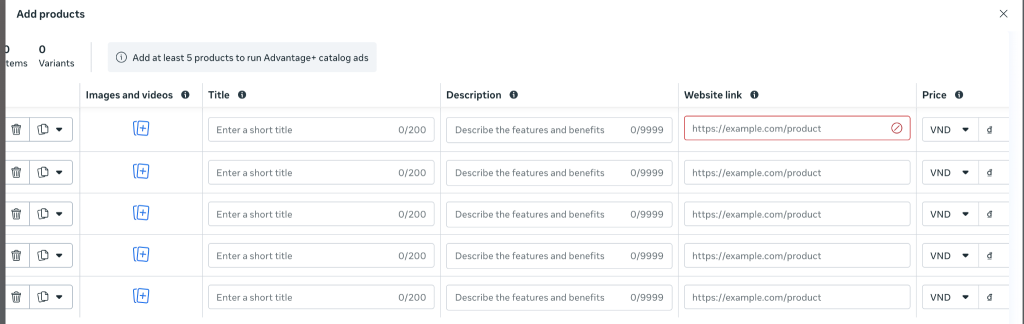
Enter the materials you prepared in advance into these fields. It is important that the offer URL contains the pixel data created earlier.
If necessary, Title and Description can be generated using AI tools by providing a detailed description of the product’s benefits and target audience.
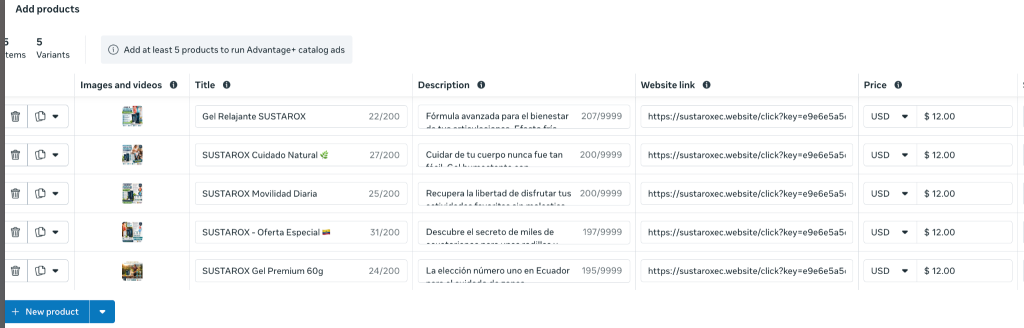
Once all required fields have been completed, click Update Products. To verify that the setup was completed correctly, go to the Data Sources section and make sure the catalog has been created without any errors.
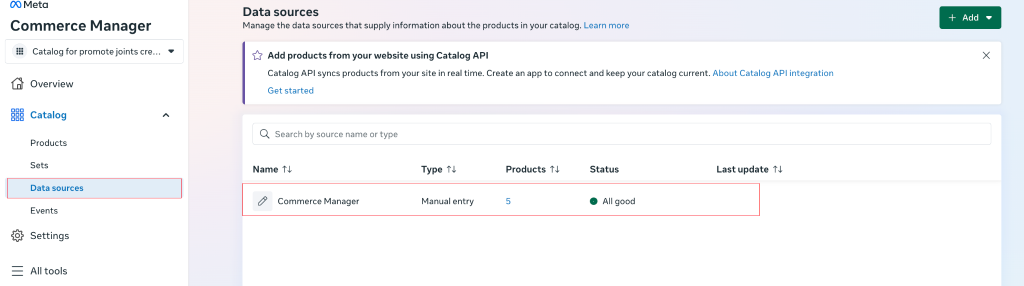
After creating the catalog, you need to grant permissions for its use. To do this, return to the main Business Manager interface, navigate to Data Sources → Catalogs, and through the Assign People section grant the required user Full Access permissions.
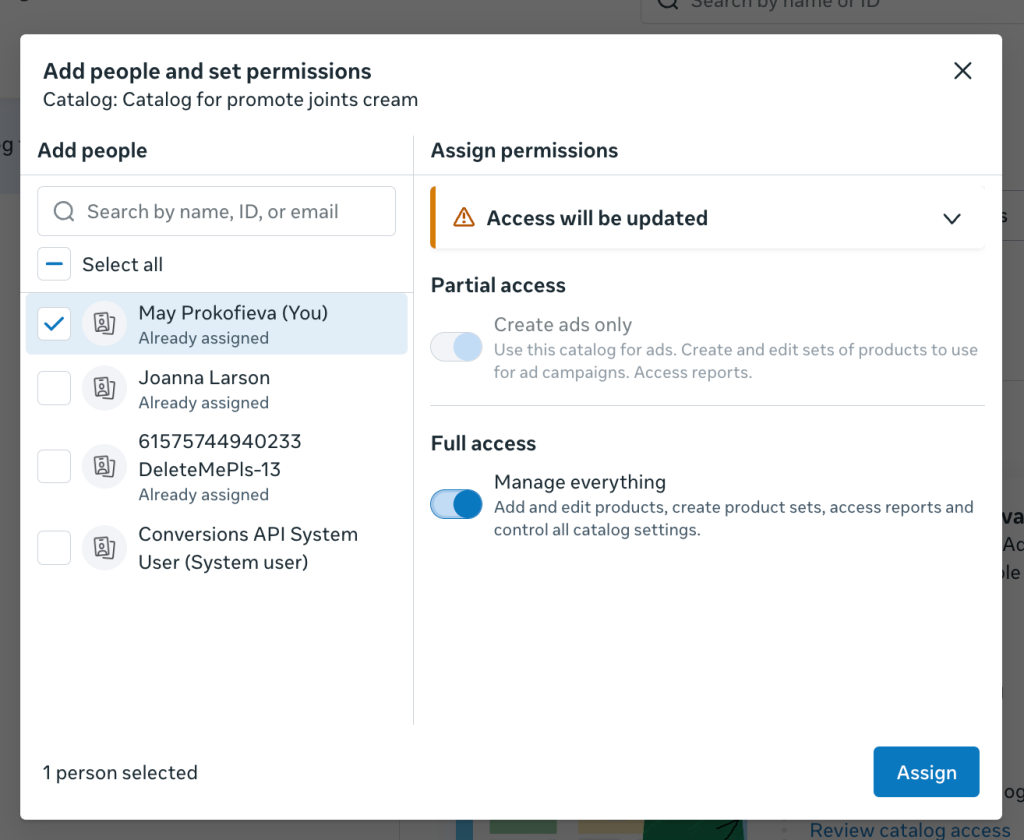
The next step is connecting the catalog to an advertising campaign.
How to Connect a Catalog to an Advertising Campaign
In this article, we will not go into detail about creating an advertising campaign itself. Audience setup, launch strategy, and campaign structure should be configured according to your chosen traffic approach.
Once you have created your campaign and ad sets, open the ad for editing and navigate to the ad editing section. The main catalog is connected within the ad setup settings.
Scroll down to the Ad Setup option and select Use a Catalog.
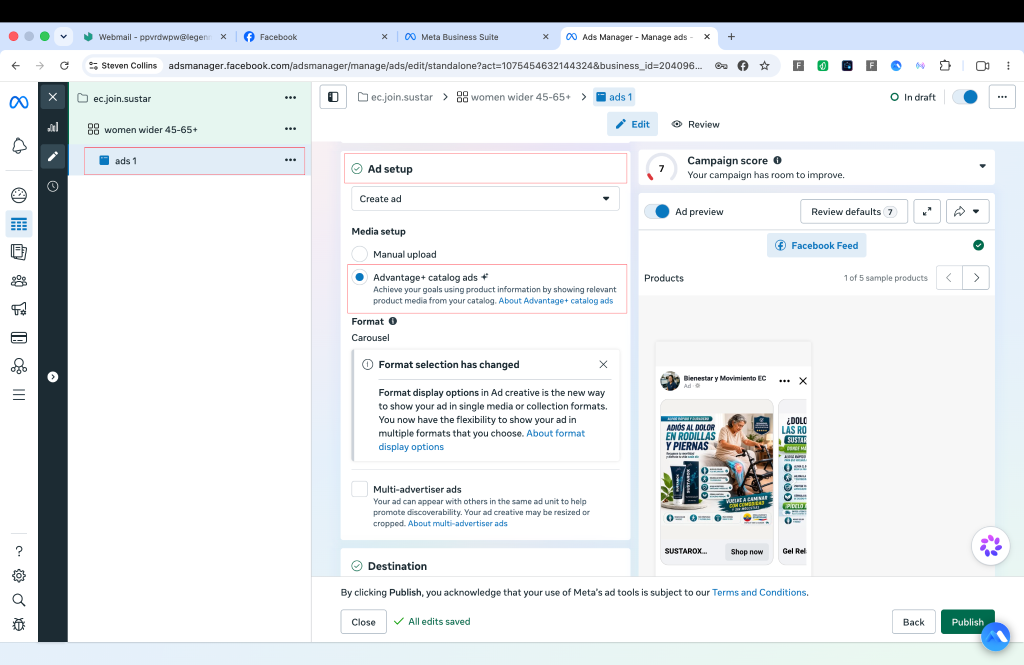
Then scroll down to the Ad Creative section and choose Slideshow.
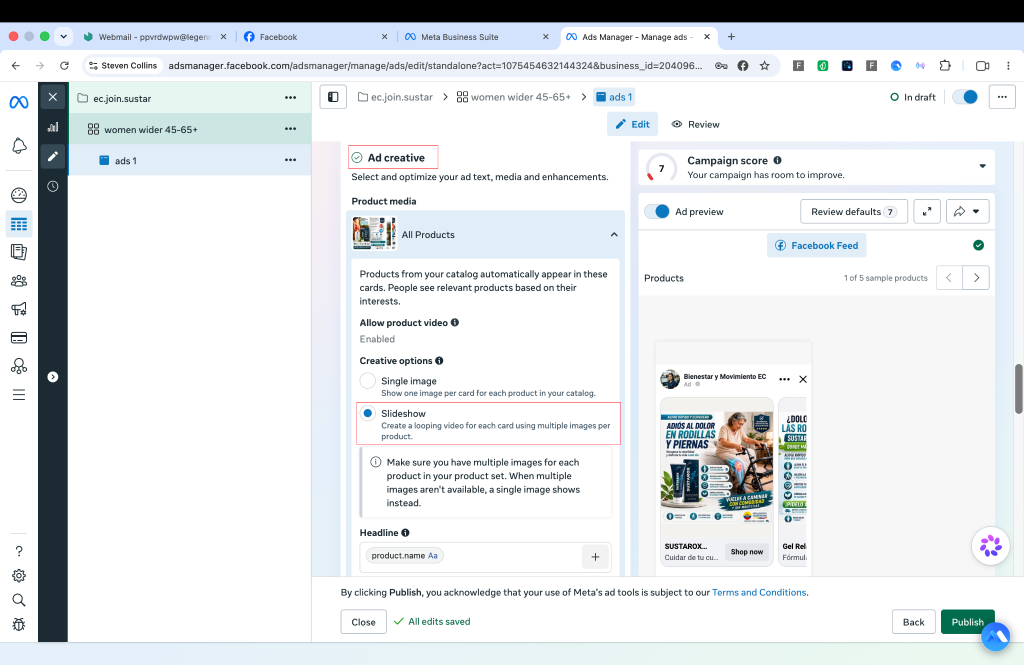
You will also need to add a headline and description for the ad, ensuring that this information is pulled directly from the catalog.
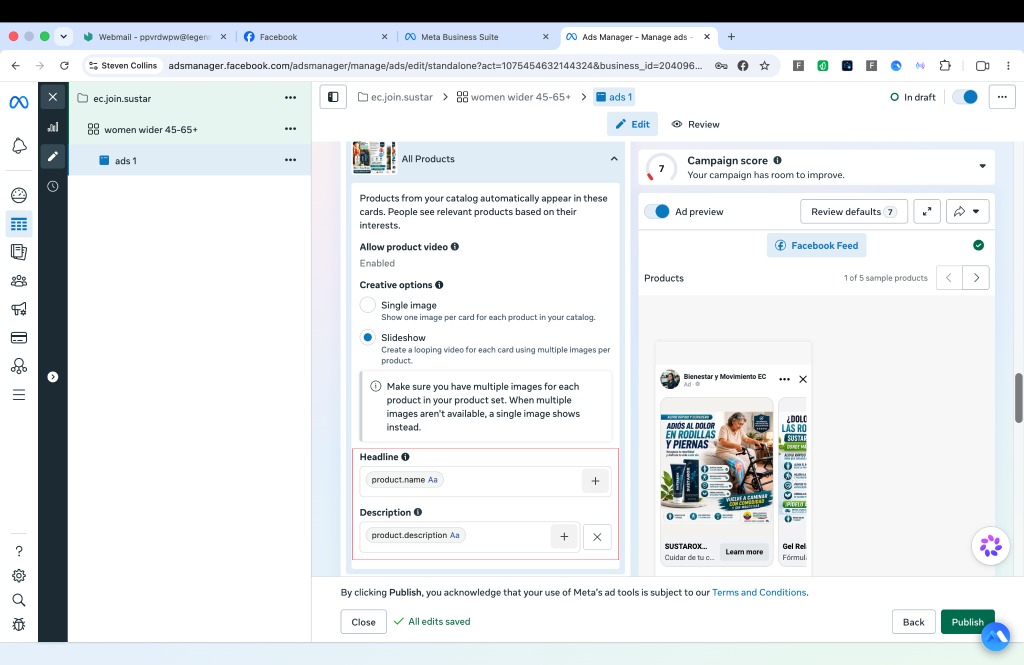
To automatically populate these fields, use the following macros:
- Headline → product.name — pulls data from the Title field;
- Description → product.description — pulls data from the Description field.
Once the setup is complete, the campaign is ready to be submitted for review.
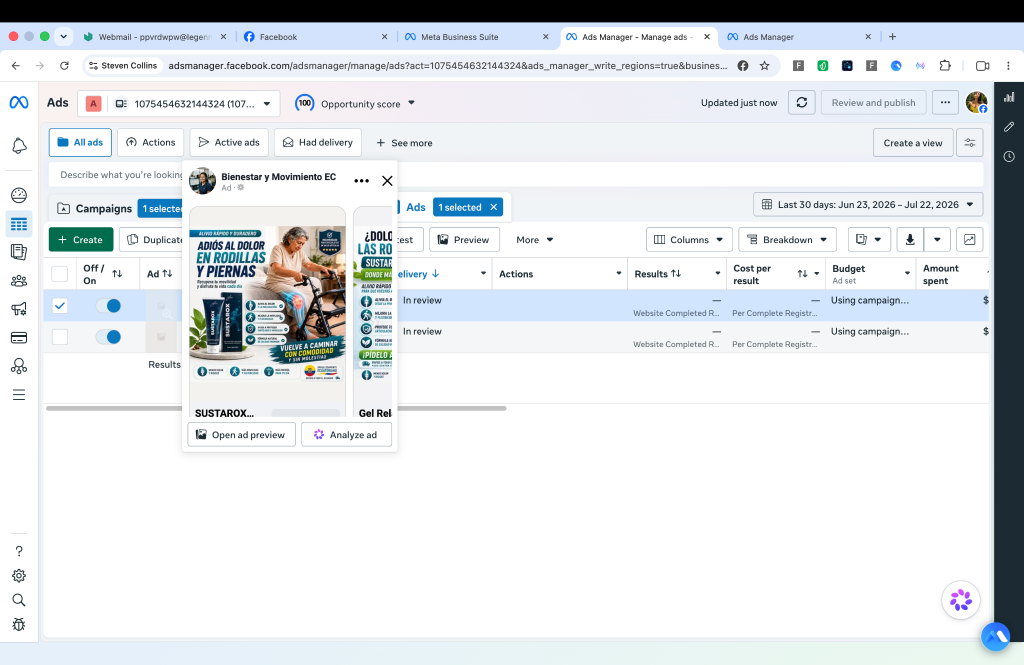
Replacing Creatives Through a Catalog
When working with catalogs, some affiliates use an additional technique — replacing creatives after the ad has passed moderation.
The process works as follows:
- A catalog is created with the initial creatives.
- The campaign passes moderation.
- After the ads go live, the materials inside the catalog are replaced.
To do this:
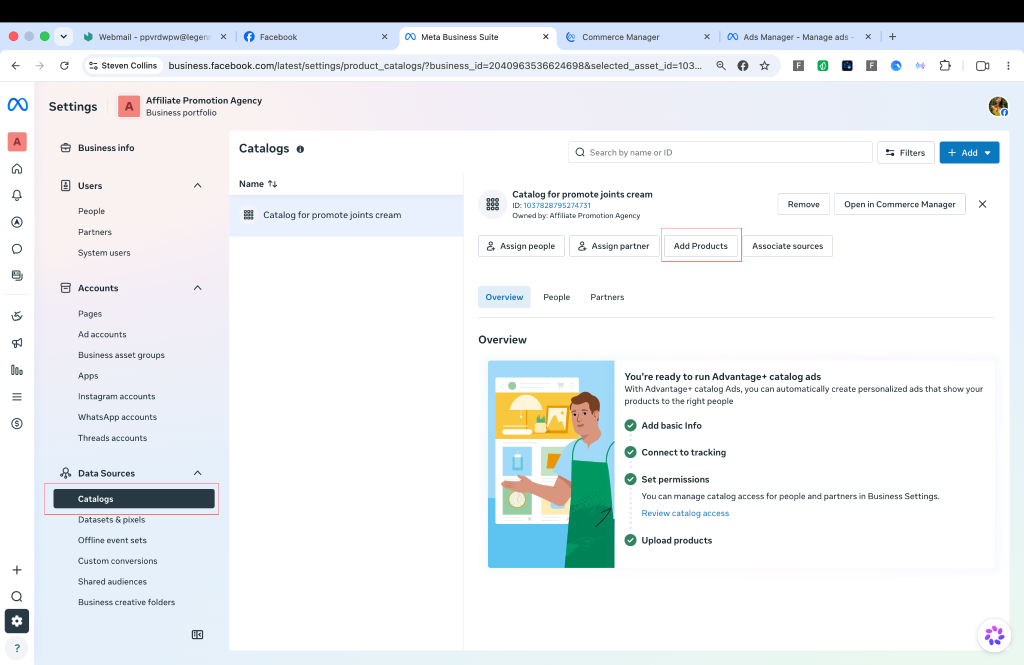
- go to Business Manager;
- open the catalog management section;
- navigate to the editing interface via Add Product;
- go to Catalog → Sets;
- click Edit Product.
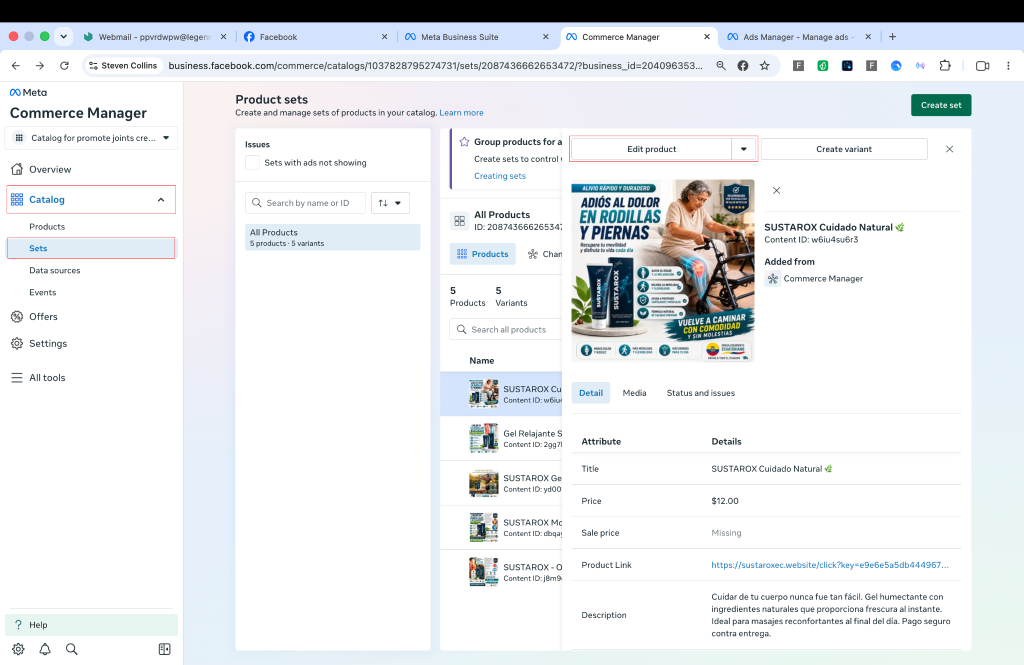
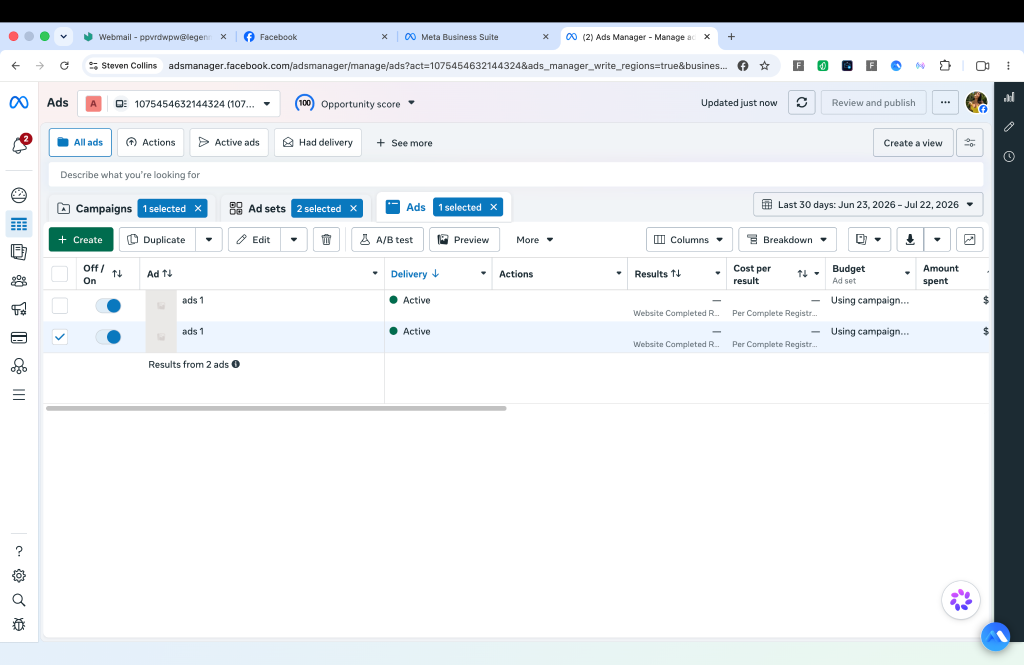
Once the data is updated, the new materials will automatically be reflected in the advertising campaign. In most cases, the changes appear within a few hours.
Conclusion
Running ads through catalogs remains one of the most popular technical approaches when working with Facebook Ads. The main advantage of this method is the ability to manage ad content with greater flexibility.
For beginners, learning these mechanics helps build a better understanding of the technical side of campaign launches and avoid common mistakes during the early stages of working with traffic.
If you are just getting started with Facebook Ads or want to test new campaign-launch strategies, the AdCombo team can help you choose suitable offers and share up-to-date recommendations for running traffic.




.png)
.png)

.png)


 English (US) ·